The Estes “Bertha Family” is a very popular model for flying in smaller fields. Their fin design has a very retro sci-fi look, and they tend to have nice slow liftoffs with lower apogees, giving you your best chance for an in-field landing when those hungry trees are around.
I typically have at least one of these great rockets in my fleet … and sometimes both. My last Baby Bertha ended up on the roof of a local school. I recently picked up a new kit at The Spare Time Shop in Marlboro, MA. I typically like to put a personal touch on my kit builds; this time I’m going to try something a little different.
I dislike using ejection wadding, especially on models with larger diameter body tubes. It just takes forgetting to put in the wadding on one launch, and you end up torching your ‘chute, making for an “interesting” recovery. For this purpose, I have taken to adding ejection baffles in models that support them. Typically an ejection baffle is installed with its bottom end at least one BT diameter away from the end of the motor mount.
The Baby Bertha is just too short to be compatible with a baffle, so I decided to go with rear ejection. With rear ejection, you typically use a longer stuffer tube with centering rings on either end. The recovery device is wrapped around the stuffer tube, and the forward centering ring is positioned far enough aft of the forward part of the stuffer tube to leave a bit of room loosely coil the shock cord around it so it doesn’t tangle at ejection.
ApogeeRockets Peak of Flight newsletter (Issue #439 [PDF]) has an article covering rear ejection, and I used that to guide my design.
Materials
The following additional materials (besides the usual adhesives and such…) not included in the kit are:
- Kevlar Shock Cord – very heat resistant and exceptionally strong.
- BT-20 body tube (for stuffer tube/motor mount).
- An extra BT-60 to BT-20 (CR-18/41.6) centering ring (to create a bulkhead).
- An extra BT-50 to BT-20 (CR-18/24) centering ring (to reinforce the forward centering ring on the stuffer tube). I didn’t have one on hand, so I used an 18mm motor hook retention ring (usually included in 18mm motor mount kits) and “FixIt” epoxy clay.
- Cardstock
The Build
Step 1:
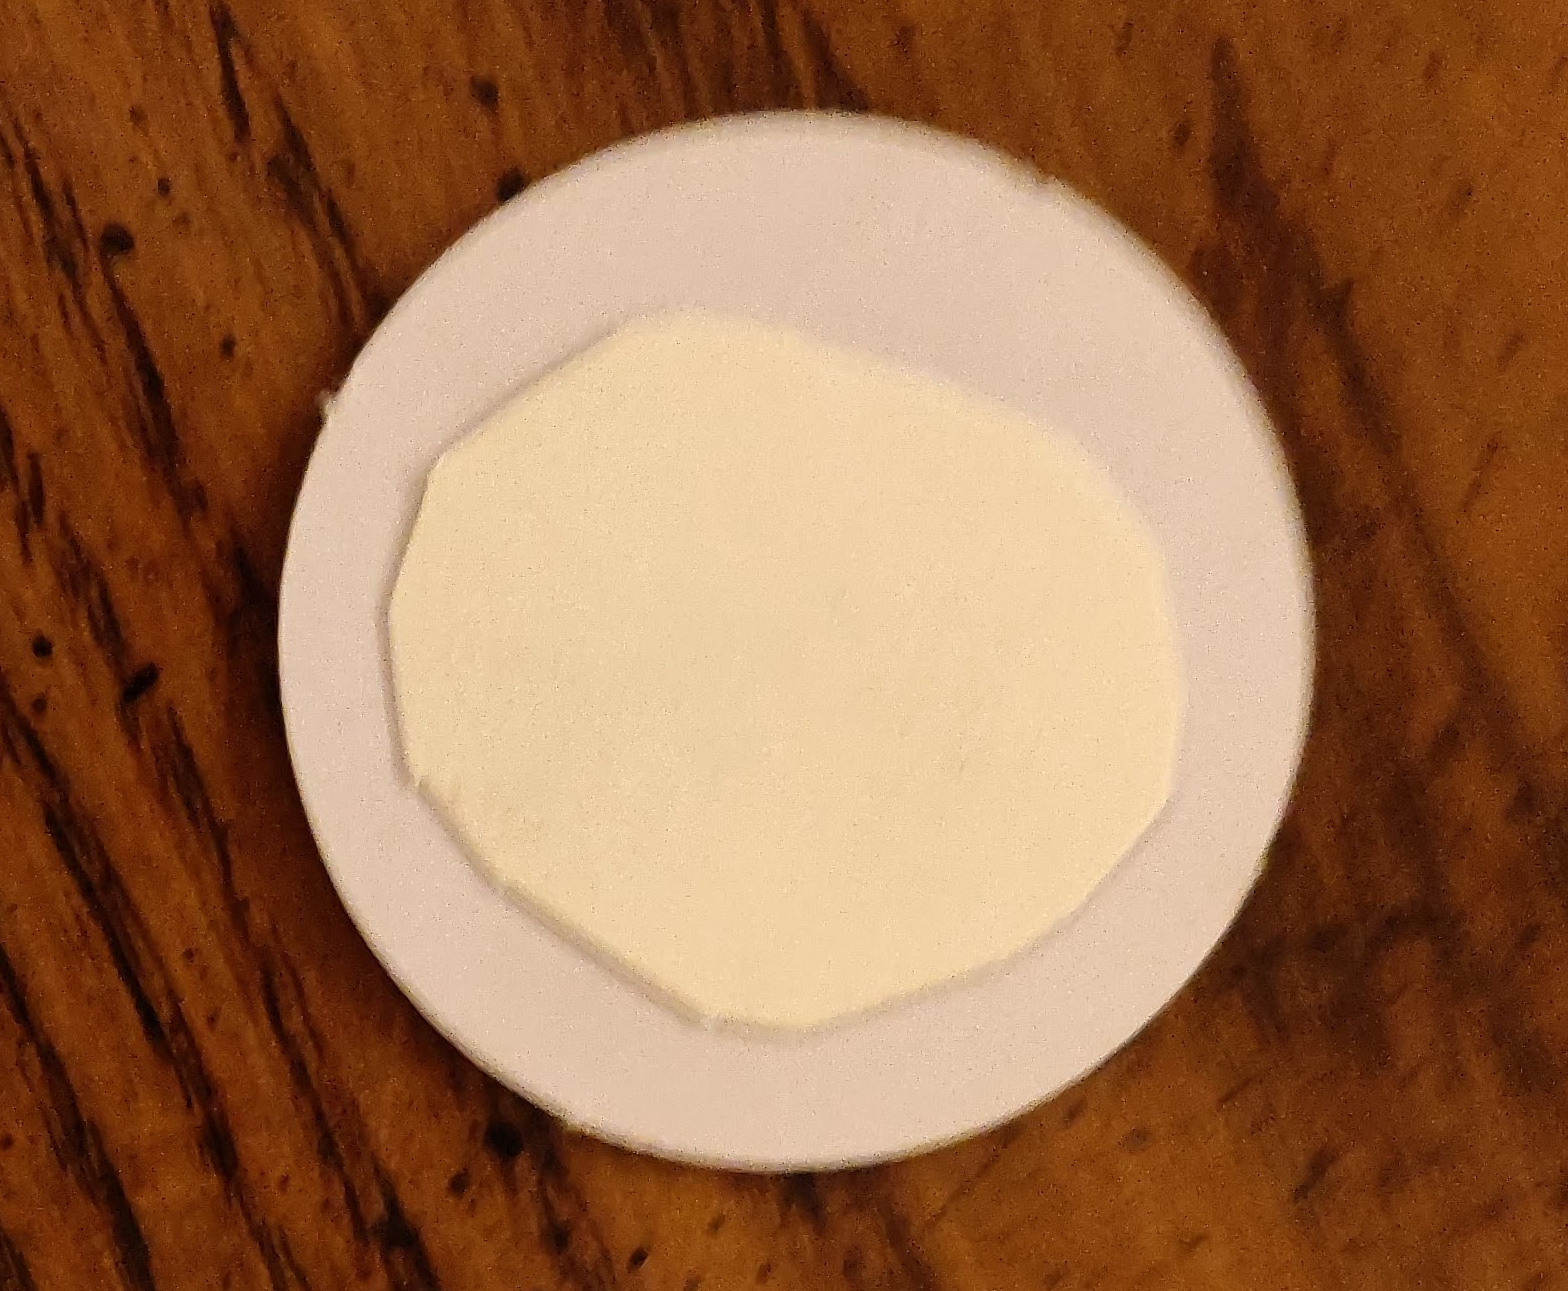 Using the extra CR18/41.6, cut out a circle of cardstock large enough to cover “punch out” in the middle, and glue in place.
Step 2:
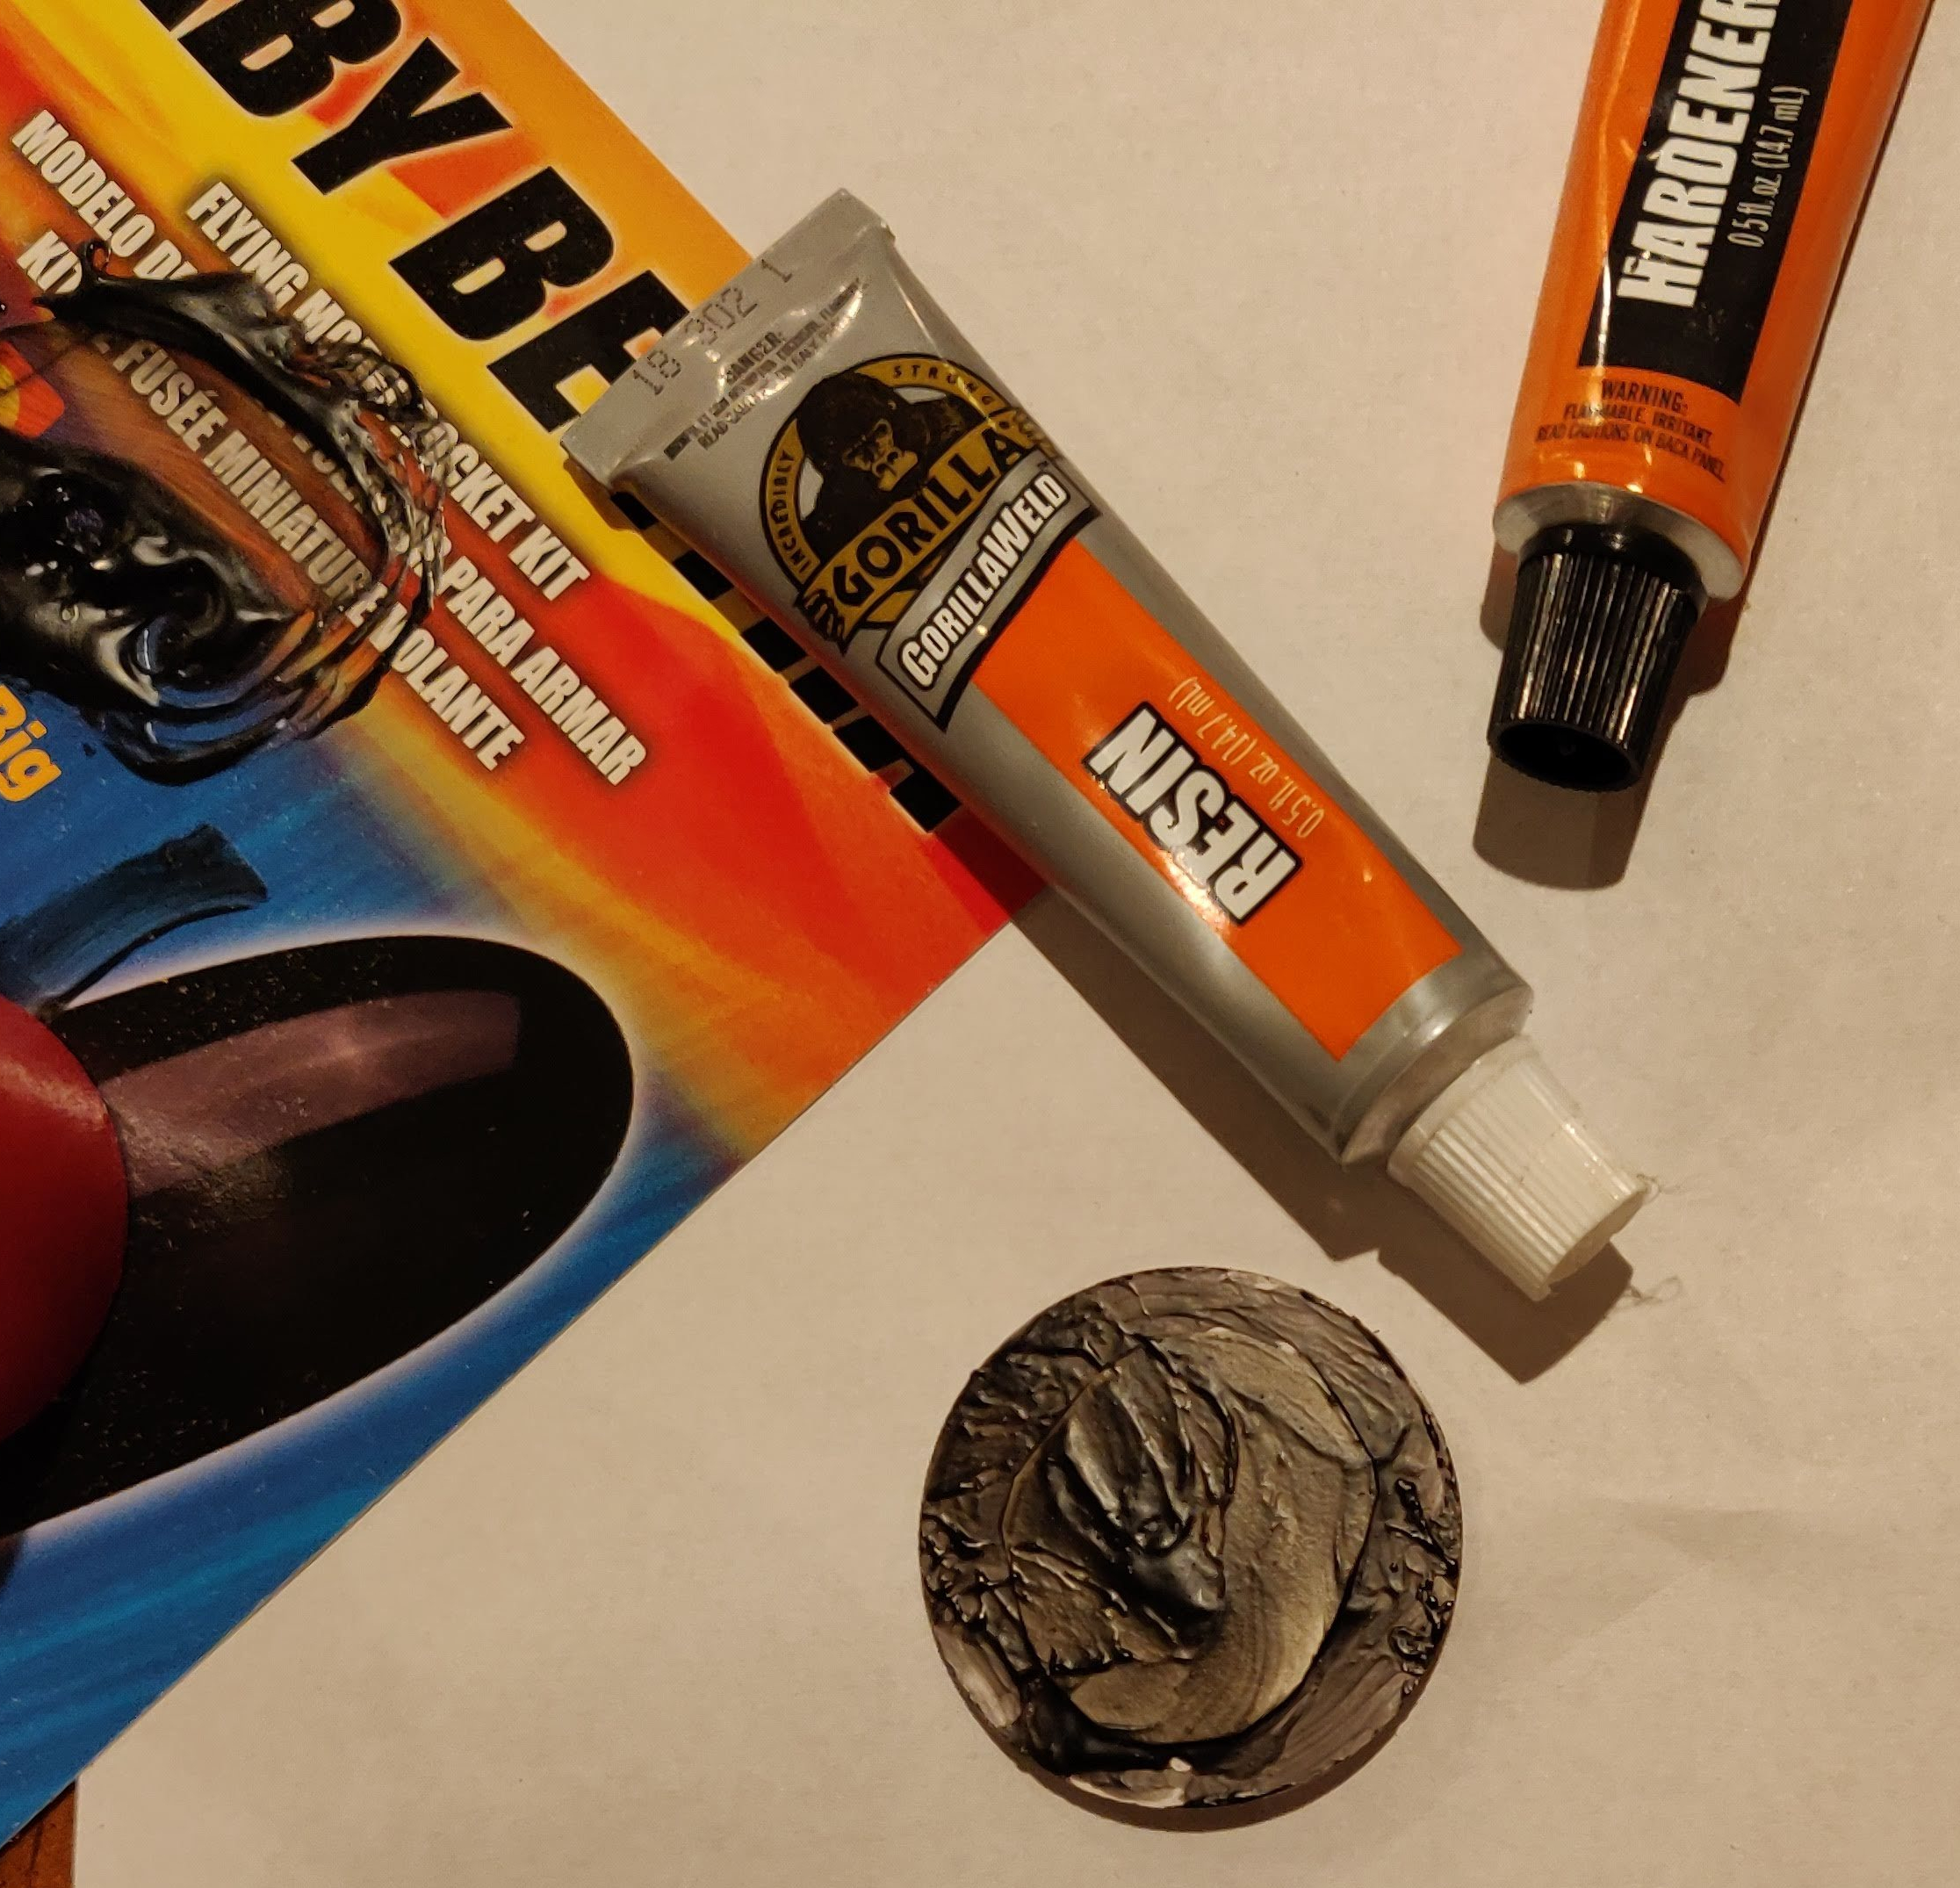 Cover the side of the centering ring that you just applied the cardstock patch to with a thin coat of epoxy. This will provide some heat shielding for the bulkhead, as the hot gasses from the ejection charge will be firing directly at it.
I used “Gorilla Weld” 10 minute epoxy because that’s what I hand on hand, but any quick setting epoxy will do.
Punch a small hole near the edge (see photo below) to allow the shock cord to pass through.
Step 3:
 Measure the height of the nose cone from the shoulder to the bottom of the inner cone, and mark the inside of the tube. Use a BT-60 coupler to push the bulkhead down to the line you marked, and add a fillet of TiteBond or white glue to fix it in place.
Cut off a length of Kevlar shock cord. At this point it’s not necessary to have the “right” length, just make sure it’s about twice the length of the body tube so you have enough slack to work with during the build. Tie it off to the loop on the bottom of the nose cone, and pass it through the hole in the bulkhead you punched earlier.
Pull the shock cord through, coat the shoulder of the nose cone with adhesive and glue it in place on the top of the body tube. Set this assembly aside.
Step 4:
 Measure the distance from the bulkhead to the aft-end of the body tube. Cut off a length of BT-20 to this measurement. This will be the motor mount/stuffer-tube. Assembly is pretty much the same as described in the kit instructions with the following changes:
- Use an 18mm motor casing (A, B or C motor), and place a mark 1/4″ from the end. This will be the motor overhang, and your guide for the depth of the motor block ring.
- Smear some glue inside the stuffer tube at the distance inside the tube where the motor block will sit. Use the motor you just marked, and push the ring up inside until you reach the mark on the motor casing and remove it quickly so the glue won’t “grab” it.
- Now install the motor clip and motor clip retention ring as per the kit instructions.
- Add the aft centering ring at the location indicated in the kit instructions and add the glue fillets.
- Punch a small hole near the inner-edge of the forward centering ring for the shock cord to pass through. I made it about a half-circle “nip” in the inner part of the ring.
- Make a mark about 1″ from the forward end of the stuffer tube, and glue the forward centering ring in place at that location.
Step 5:
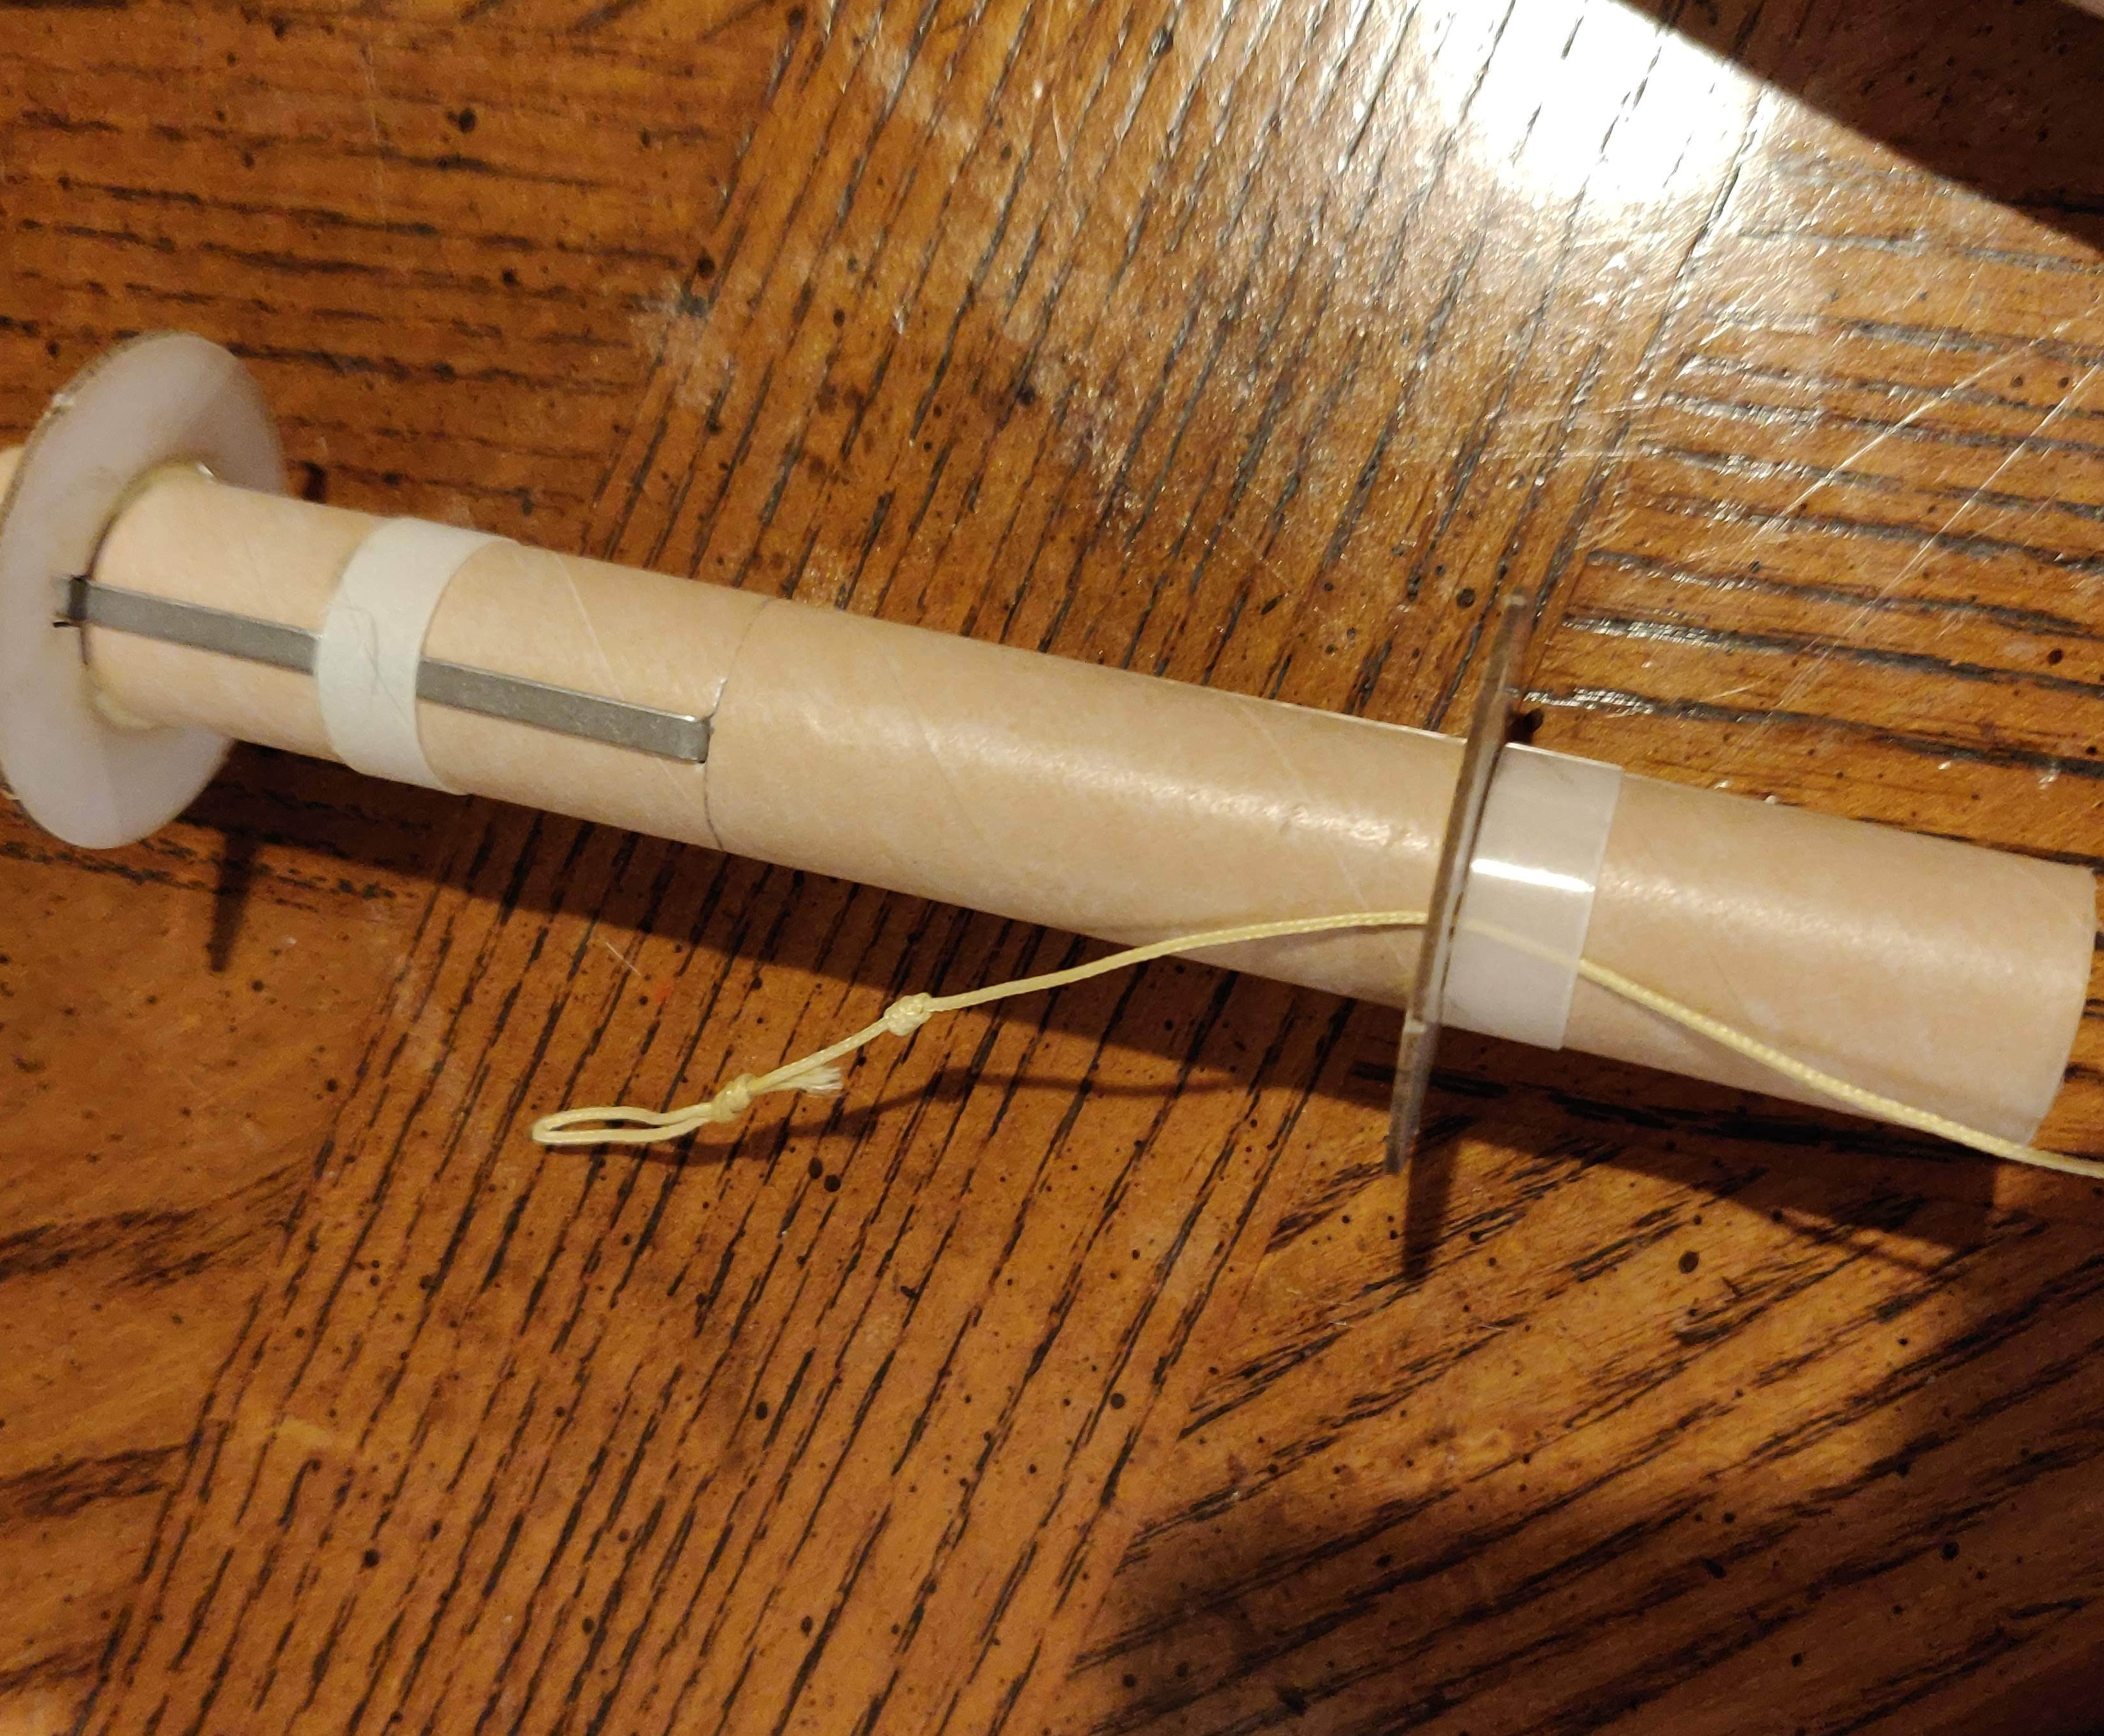 Thread the shock cord through the CR-18/24 centering ring, and then thread the shock cord through the hole you punched earlier. Apply some glue to the stuffer tube forward of the centering ring and then slide the CR-18/24 ring into place to reinforce the forward centering ring (note that I used a motor clip retention ring, as I didn’t have a CR-18/24 on hand). Thread the shock cord through the CR-18/24 centering ring, and then thread the shock cord through the hole you punched earlier. Apply some glue to the stuffer tube forward of the centering ring and then slide the CR-18/24 ring into place to reinforce the forward centering ring.
Make sure to leave yourself several inches of shock cord on the other side of the centering ring to tie a loop in the end, as well as another knot about 1/2″ back from the loop to anchor it into the epoxy we’ll be adding in the next step.
Step 6:
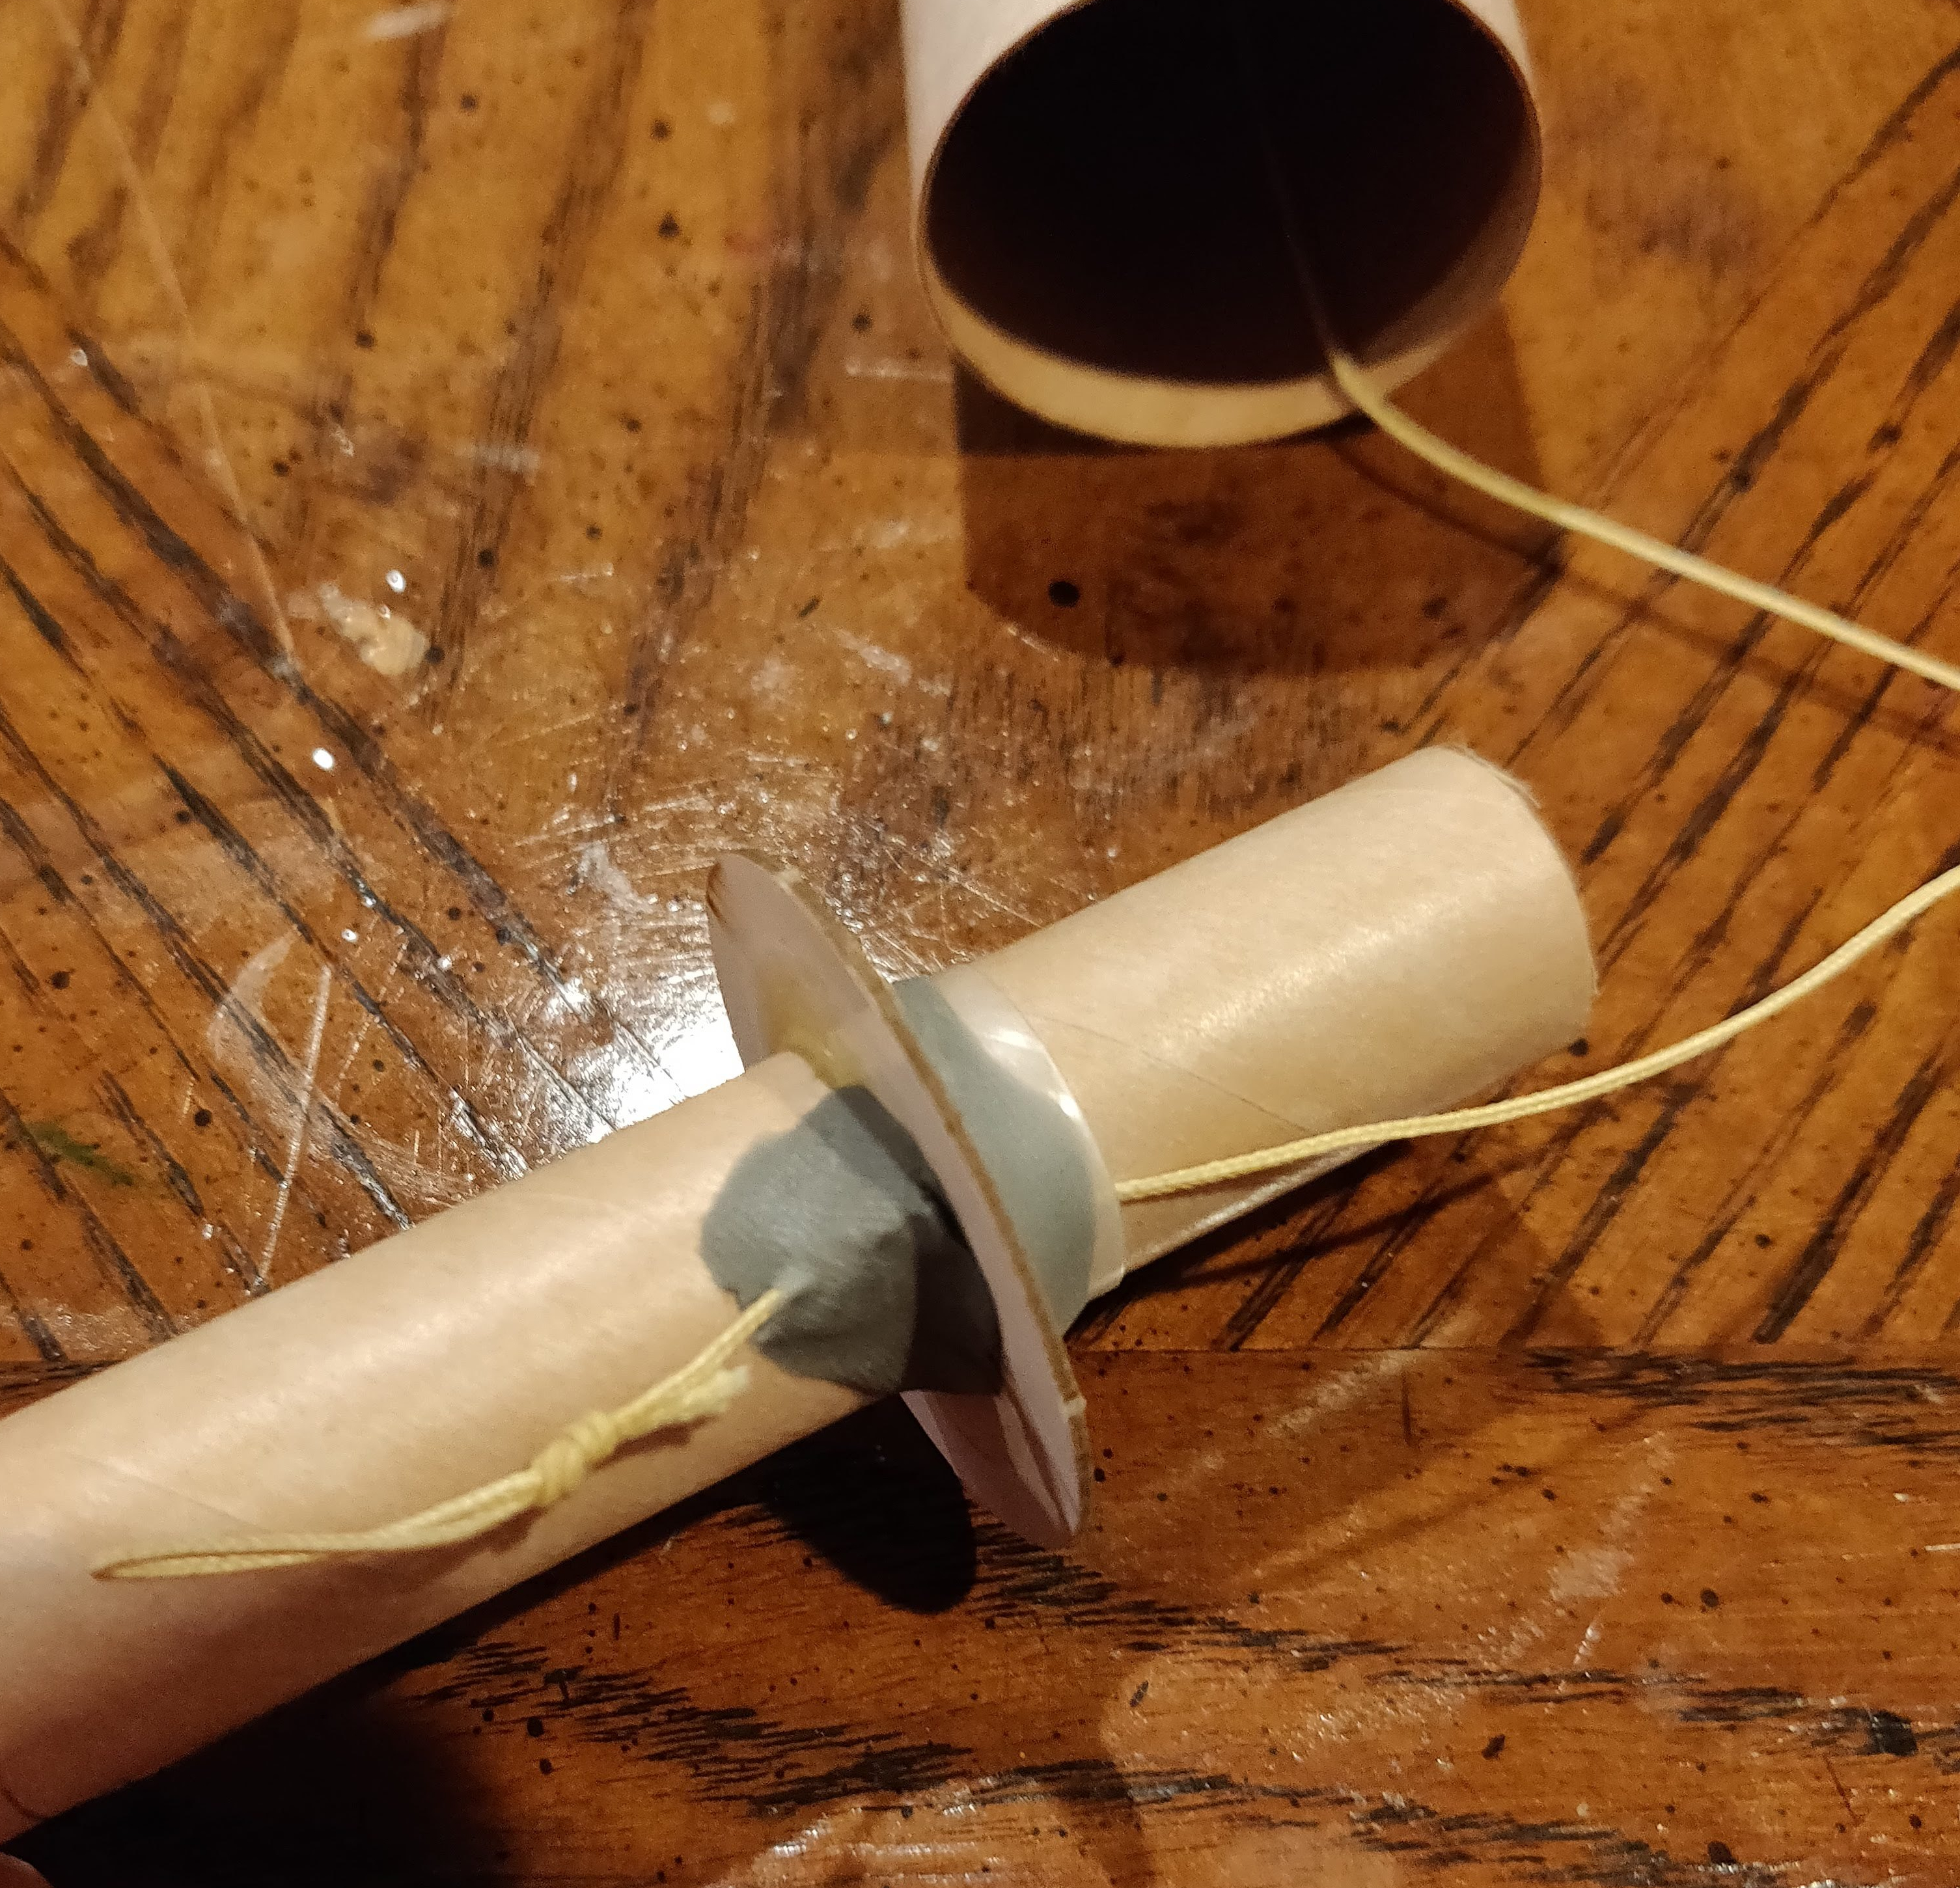 Pull the shock cord back so that the knot is just aft of the hole it passes through. Using putty or clay-like epoxy (I used Fixit epoxy clay, but anything like it – such as JB Weld would work just as well), fix the shock cord on the aft-side of the forward centering ring and smooth it out. Then, fillet the forward side with the epoxy for additional reinforcement.
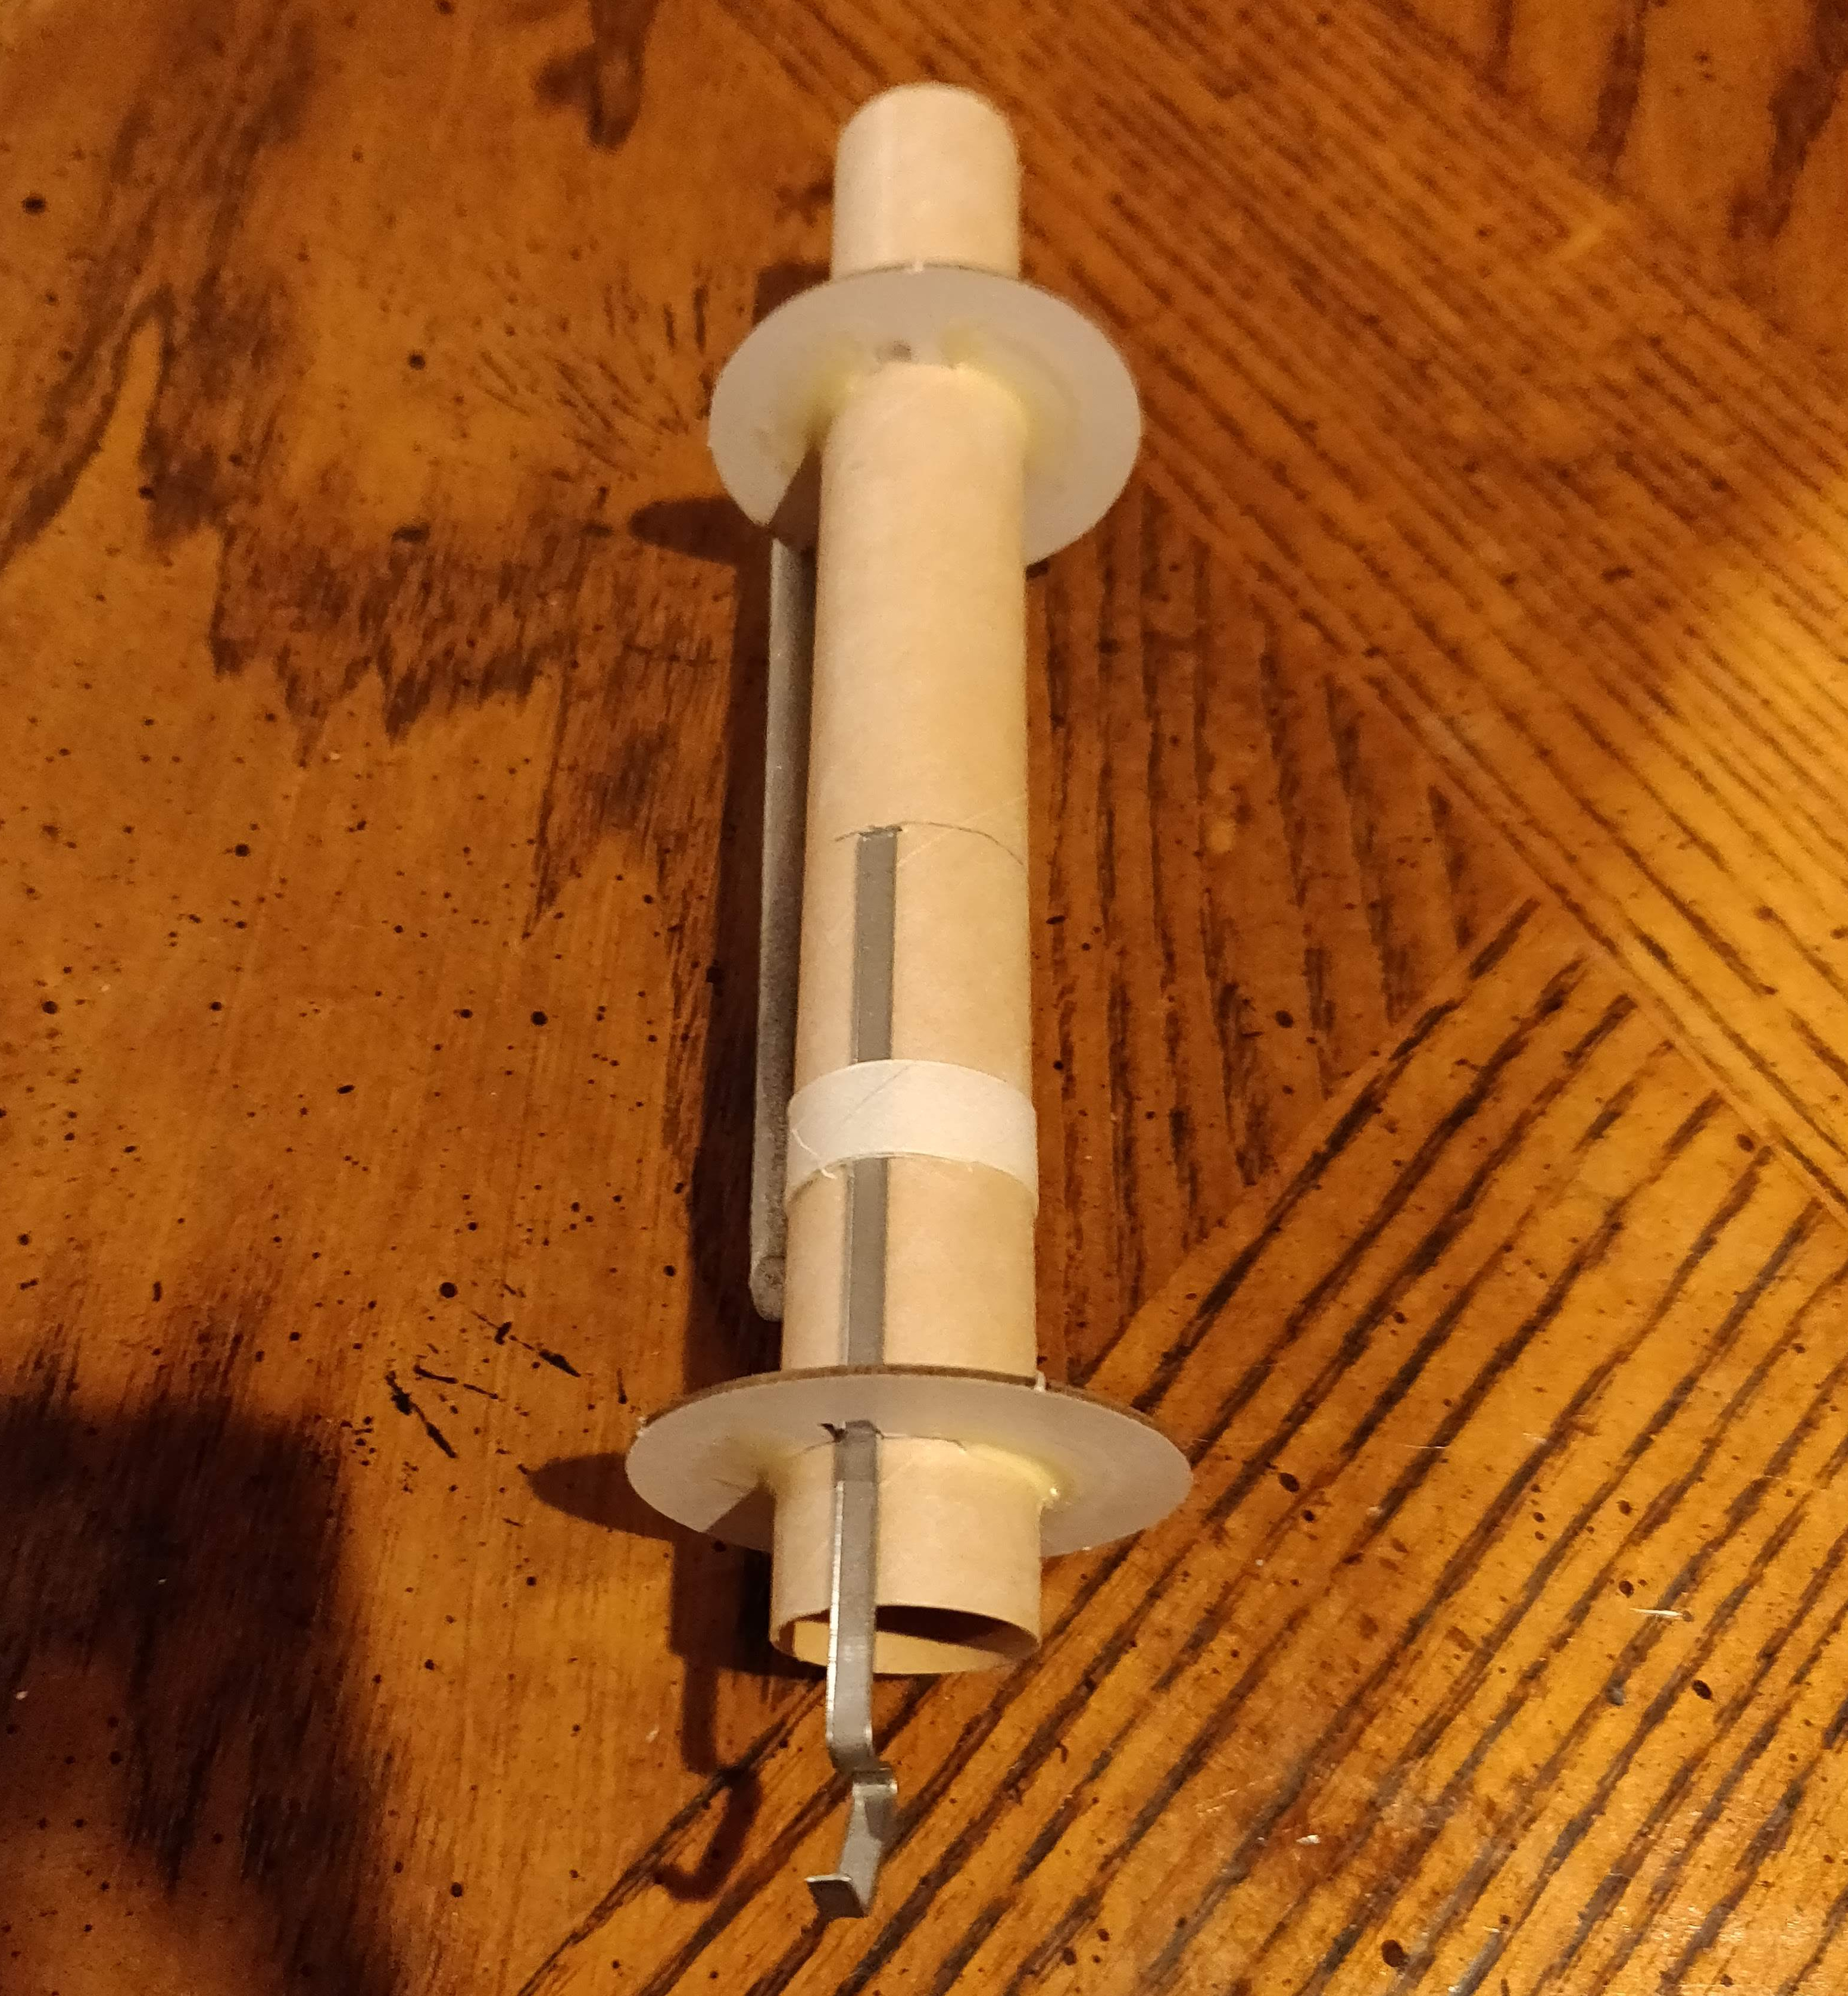
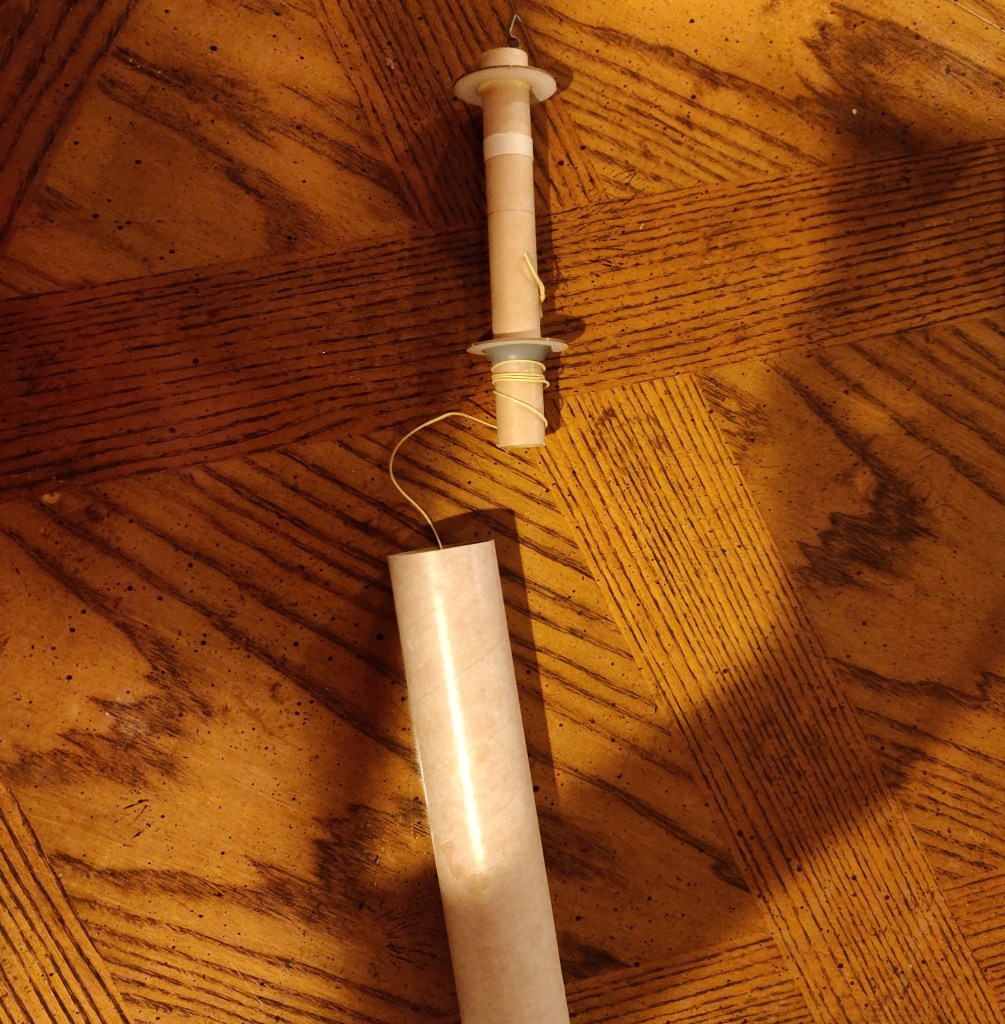
The completed assembly should resemble the image below. Note how the shock cord is wound around the forward end of the stuffer tube. This should pay out smoothly during ejection, similar to how fishing line pays out off of a spincast reel.
Assemble the rest of the kit as per the the provided instructions.
In my next post on this build, I’ll provide a video of my static testing, and provide recommendations on completing the recovery system.
