For as long as I can remember, I've had a strong interest in science, aviation, rockets, all things "techy", and anything mechanical. Right brained? That's me in so many ways. Years ago I was heavily involved in model aviation. I built and flew mostly e-powered planes - everything from mostly pre-built kits all the wayContinue reading "Who Am I? How’d I Get Here?"
Mean Machine Mk. II
In an earlier post, I review the Estes Mean Machine (001295) and discuss the benefits and shortcomings of this really great rocket. With this build, I'm going to try and address some of the shortcomings of the "out of the box" build of this model. Planned mods: Replace 3/16 launch lugs for 1/4" lugs +Continue reading "Mean Machine Mk. II"
Estes Mean Machine (#001295)
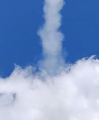
Beginning countdown, Engines on... The Estes Mean Machine (#001295) is a fantastic looking sport flier. It's built up with four lengths of BT-60 body tubes, and stands 79" tall. You'll definitely get some attention as you approach the flight line with this rocket over your shoulder, and you'll keep their attention with its dramatic slowContinue reading "Estes Mean Machine (#001295)"
Bertha’s Breech Baby – Part 4
Build Complete Breech Baby in paint I completed the Breech Baby build late last week and got it filled, primed and painted over Friday and Saturday. I'm very satisfied with the final outcome of this build. The lack of a nose cone seam is a nice look. The only disappointment I had in the finishContinue reading "Bertha’s Breech Baby – Part 4"
Boosted Bertha (#1946)
Boosted BerthaPhoto Credit: estesrockets.com The Boosted Bertha is Estes' latest addition to their popular Bertha family of rockets. These low-power rockets fly on 18mm engines, and sport fat BT-60 body tubes, retro-futuristic fin shape, and a blunt nose cone. These rockets are a lot of fun to launch, as they have nice, slow liftoffs andContinue reading "Boosted Bertha (#1946)"
Estes Black Brant II (#7423)
Estes Black Brant II. Photo Credit: estesrockets.com This build log will be for the re-released Estes Black Brant II (#7423). I've seen some very nice-looking scale builds of this model of the Canadian built sounding rocket. I won't be going for a scale build, my focus will be more on making this a durable sportContinue reading "Estes Black Brant II (#7423)"
Bertha’s Breech Baby – Part 3
Rough sanding and first coat of prime I've completed assembly of the airframe. It just took a bit of CWP to fill the nose cone to body tube joint. A coat of sanding primer and some sanding with 220 grit paper, and not a spiral or groove to be seen. I also experimented with usingContinue reading "Bertha’s Breech Baby – Part 3"
Bertha’s Breech Baby – Part 2
See here for Part 1 of this build Static Test #1. This static fire with an A8-3 validates the proof of concept. I've attached the parachute directly to the kevlar loop for the purposes of this test so that we're testing the system with all the important pieces in place. https://youtu.be/ofaSRcB7NOI As you can see,Continue reading "Bertha’s Breech Baby – Part 2"
Bertha’s Breech Baby – Part 1
The Estes “Bertha Family” is a very popular model for flying in smaller fields. Their fin design has a very retro sci-fi look, and they tend to have nice slow liftoffs with lower apogees, giving you your best chance for an in-field landing when those hungry trees are around.
I typically have at least one of these great rockets in my fleet … and sometimes both. My last Baby Bertha ended up on the roof of a local school. I recently picked up a new kit at The Spare Time Shop in Marlboro, MA. I typically like to put a personal touch on my kit builds; this time I’m going to try something a little different.
Read more
